Last month the ladies at Crafting for all Seasons Challenge Blog honored me with their I Inspire Award for my July Calendar Page. They also asked me if I would put together a tutorial on how to make the calendar page. I've never done a tutorial before. I figured this would be the perfect opportunity to try something NEW.
Here's my tutorial on how to make a calendar page....
Part 1 Making the Calendar:
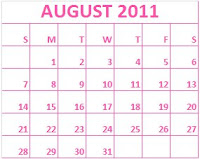
The first thing I do when making my calendar page is to make the actual calendar. There are several different ways you can do this and several places online that you can download already created calendar templates. Being the complete Microsoft Excel GEEK that I am I chose to make a simple calendar in Excel and then just copy and past it into MSWord. You can make a calendar directly in Word as well. I like the functionality of Excel for adjusting my widths. There are calendar templates already built into Word and Works so if you just do a quick internet search on calendar templates you will find plenty of options. Here's a link to 2011 Calendar Templates at MicrosoftOffice.Com. Once I have the calendar made I change the font color to match the colors I plan to use for my project and then I print it out in a few different sizes. (I like to have options when I'm designing the page and having more than one size calendar does come in handy).
While I was searching for more calendar templates online for this tutorial I came across Cat's Creations website. She has free downloadable calendars HERE.
Part 2 Making the Calendar Page:

Step 1: Measure out your cardstock to fit in your calendar display opening. My calendar display stand opening is 7 inches wide by 8 inches tall. My calendar base layer is 6 1/2 inches by 6 1/2 inches.

Step 2: Design your calendar page. Just like making a card or scrapbook page.

Step 3: Punching the holes. Flip the calendar page over. Line the page up with a straight edge. I use my lined mat to make sure my measurements will be equal distance from the top of the calendar. You can also measure a spot from the top of the calendar on each end of the page and draw a line connecting the dots to make sure you're on a straight line. Next you want to measure the halfway point of the page. With a 6 1/2 inch wide base the halfway point is 3 1/4 inches. Divide that by 2. Mark your page at the point which is halfway from the center to each end. Use a hole punch and punch out a small hole at each mark.
If you want to skip the step for measuring out the holes for your calendar page, you can purchase a 6 x 6 page protector and insert your calendar page into the clear sleeve. The page protectors already have two holes punched at the top!
All that's left to do is hang your calendar on the stand. My calendar stand came with rings to attach the calendar to the stand. You can also use ribbon or twine.
Here's my finished Calendar Page:

Thanks for stopping by and checking out my calendar page tutorial!


4 comments:
Julie, how great to get the 'I Inspire' Award. And, thanks for the wonderful tutorial and the link for calendars. Super job!!!
Great tutorial Julie! I am going to have to try and make a calendar myself!
Love it!
Julie - this is just adorable! And I LOVE that You used Poppi on it! =)
Hugs & Happy Days!
~Min
This is totally cool! Where did you get the calendar stand? I've never seen a project like this. I love it. My friend makes calendars every month with her Designer's Calendar Cricut cartridge. She would love this. I'll forward her the link. :) Janis@slowar.com
Post a Comment