Sunday, July 31, 2011

Frozen Treats / August 2011 Calendar Page


HAPPY AUGUST!!!!!  August is by far my FAVORITE month of the year.  I'm all about summer and I just love the warm August weather here in Michigan!

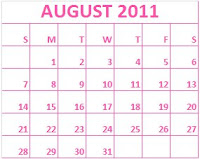
Today I'm sharing my August calendar page!  Since the 1st of August also falls on a Monday I decided to combine my calendar page with the Totally Stampalicious Challenge this week.  This week's challenge is to use some sort of Frozen Treat on your creation.  Keeping with the theme of my favorite things I chose ICE CREAM for my frozen treat.  I used the newly released Poppi Penguin stamp set for my image. The calendar was created Microsoft Excel.  The ice cream cones were made using the Stampin' Up scallop circle punch and a triangle that I cut free hand on my paper trimmer.  The calendar stand is from Taylored Expressions.

I also created a tutorial for making calendar pages.  You can find the tutorial just below this post.

Here's a link to the Totally Stampalicious Blog where you can find some more fabulous frozen treat inspiration!


Thanks for stopping by and checking out my frozen treats calendar page! 

Here are a few more calendar pages to inspire you:


Kathryn Scrap Happy


Before I go I have a couple blog awards to pass along.  Thanks to Pam at CraftyCards4u2 for selecting me for the blog awards!


I've selected 3 Blogs and my readers to pass this on to:

1.  Min at Kaymin Kreations
2.  Tammy at My Craft Central
3.  Elizabeth Allan at Elizabeth Allan's Art Studio
4.  My Blog Readers (if you haven't received either one of these awards please feel free to pick them up and pass them on!)


Calendar Page Tutorial

Last month the ladies at Crafting for all Seasons Challenge Blog honored me with their I Inspire Award for my July Calendar Page.  They also asked me if I would put together a tutorial on how to make the calendar page.   I've never done a tutorial before.  I figured this would be the perfect opportunity to try something NEW.  

Here's my tutorial on how to make a calendar page....

Part 1 Making the Calendar:


The first thing I do when making my calendar page is to make the actual calendar.  There are several different ways you can do this and several places online that you can download already created calendar templates.  Being the complete Microsoft Excel GEEK that I am I chose to make a simple calendar in Excel and then just copy and past it into MSWord.   You can make a calendar directly in Word as well.  I like the functionality of Excel for adjusting my widths.  There are calendar templates already built into Word and Works so if you just do a quick internet search on calendar templates you will find plenty of options.  Here's a link to 2011 Calendar Templates at MicrosoftOffice.Com.  Once I have the calendar made I change the font color to match the colors I plan to use for my project and then I print it out in a few different sizes.  (I like to have options when I'm designing the page and having more than one size calendar does come in handy).


While I was searching for more calendar templates online for this tutorial I came across Cat's Creations website.  She has free downloadable calendars HERE.


Part 2 Making the Calendar Page:


Step 1:  Measure out your cardstock to fit in your calendar display opening.  My calendar display stand opening is 7 inches wide by 8 inches tall.  My calendar base layer is 6 1/2 inches by 6 1/2 inches.


Step 2:   Design your calendar page.  Just like making a card or scrapbook page.


Step 3:  Punching the holes.  Flip the calendar page over.  Line the page up with a straight edge.  I use my lined mat to make sure my measurements will be equal distance from the top of the calendar.  You can also measure a spot from the top of the calendar on each end of the page and draw a line connecting the dots to make sure you're on a straight line.  Next you want to measure the halfway point of the page.  With a 6 1/2 inch wide base the halfway point is 3 1/4 inches.  Divide that by 2.  Mark your page at the point which is halfway from the center to each end.  Use a hole punch and punch out a small hole at each mark.

If you want to skip the step for measuring out the holes for your calendar page, you can purchase a 6 x 6  page protector and insert your calendar page into the clear sleeve.  The page protectors already have two holes punched at the top!


All that's left to do is hang your calendar on the stand.  My calendar stand came with rings to attach the calendar to the stand.  You can also use ribbon or twine.


Here's my finished Calendar Page:


Thanks for stopping by and checking out my calendar page tutorial!


Thursday, July 28, 2011

Totally Stampalicious New Release and Blog Hop - JULY 2011


WELCOME!!
You've reached the 8th STOP of the July Release BLOG HOP!
It's time for another FUN and FABULOUS release from Totally Stampalicious and we are so excited to share the latest selections from our Bugaboo Line by the ever-impressive artist, Jodie Mackerell of Bugaboo Digi Stamps!

This month we are shaking things up and we have also added a new artist to our Totally Stampalicious family!  Please give a warm welcome to Sylvia Zet of Wee Stamps!

ALL SIX NEW STAMP SETS
are available NOW at
Totally Stampalicious!

As always we have some PRIZES that we want to give away to a few of our lucky Hoppers so be sure to comment on ALL of the DT's blogs for your chance to WIN one of these AWESOME treats!!
1st Prize - ALL SIX New Stamp Sets!
2nd Prize - $15 Gift Certificate
3rd Prize - $5 Gift Certificate

Now in case you get lost along the way here is the complete blog hop line up!


I made cards for 4 of the sets being released today.  Up first is my Poppi Penguin Card:


The mesh tape at the bottom of my Penguin card is drywall tape!


My Second card today is using the fabulous Hippie Dottie Stamp Set!


 Doesn't Hippie Dottie look Fabulous surrounded by Flowers!

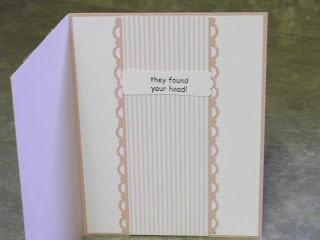
Next up is Nurse Margaret:

The inside of the card reads:  They Found Your Head - LOL


I'm entering Nurse Margaret in the following challenges:

Sweet Sunday Sketch:  SSSC127

In case you missed my sneak peek earlier this week - here's my Friendly Dexter card:


Remember to leave a comment on this post and then head on over to the next stop on the Blog Hop - My talented friend Lori at  Inkingly Yours

Thanks for stopping by and checking out my cards!


Sunday, July 24, 2011

Anything Goes Dexter Sneak Peek


Mark your calendars.....this Thursday (July 28) Totally Stampalicious is having a New Release and Blog Hop at 9:00 PM EST!  You do not want to miss this amazing release - not to mention the cool PRIZES!  Just to give you a little sneak peek today I used our soon to be released Friendly Dexter stamp set.  We are releasing 6 new stamp sets this week!  Our design team has been hard at work creating some awesome cards for the release!  We'll be having sneak peeks tomorrow and Wednesday too so be sure to check back!

This month we would like to introduce to you a new artist to the Totally Stampalicious family!  Some of you may have seen some of her work before as she owns her own digi stamp company called Wee Stamps.  Please welcome SYLVIA ZET!


Our challenge theme this week is Anything Goes so be sure to post your projects to the challenge on the Totally Stampalicious Blog!

This card is 5 inches square.  The base is white.  It's a little hard to see in the picture because the base blends in with the background.  My daughter Emily picked out the designer paper for this card.  She has good taste in designer paper doesn't she?  It's a beautiful bright green with glittery polka dots.  It goes perfectly with the Friendly Dexter image - fun and whimsical!  The base cardstock behind the green is actually a dark purple.  It looks more navy in the picture but it's purple in real life (IRL). 

Be sure to check out the other great samples from the Design Team over at the Totally Stampalicious Blog.  There might just be some other sneak peeks there too!

Don't forget to come back on Thursday for the New Release and Blog Hop! 


Thanks for stopping by and checking out my card today!


Friday, July 22, 2011

Christmas in July Anything Goes


Today's challenge at Bugaboo Stamps Catch the Bug Challenge Blog is Anything Goes.  I decided to end the week with the same color combo that I started the week with - certainly celery, chocolate chip, and whisper white.  The image I used is one of my all time favorites - Christmas JJ.  She's looking fabulous and festive in her reindeer costume isn't she?

Thanks for stopping by and checking out my card!  I'll be back on Monday with a new challenge for Totally Stampalicious!  Have a FAB*U*LOUS Weekend!

Thursday, July 21, 2011

Christmas in July Snow


I made this adorable card for today's Challenge at Bugaboo Stamps Christmas in July Challenge.  Today's challenge theme is snow.  I knew Eggbert Winter would be perfect for this "snow" theme.  For the layout I used this week's Sweet Sketch Wednesday Sketch 111.  I love the Navy, White and Silver color combo for Christmas and I think it went perfectly with the snow theme!  The sentiment stamp is from Amuse Art Stamps.

Thanks for stopping by and checking out my card!  I'll be back tomorrow with my card for the Anything Goes challenge at Bugaboo.


Wednesday, July 20, 2011

Sketch Challenge at Bugaboo


Just a quick post today to share the card I made for today's challenge at Catch the Bug Challenge Blog.  Each day this week is a new Christmas challenge and today's challenge is a sketch challenge.  Here's the sketch:


I used the Bugaboo Winter Birds - Snowman digi stamp for the image.  Isn't it just adorable?
Thanks for stopping by and checking out my card!

Tuesday, July 19, 2011

Bugaboo Christmas in July - Free Digi Day!

Supplies:
Stamps:  Ruby Free Digi, Unknown Christmas Sentiment Stamp
Paper:  Real Red, Certainly Celery, Whisper White, Heidi Grace Designs DP
Ink:  Barely Banana, Blush Blossom, Real Red, Certainly Celery, Garden Green, Basic Black
Accessories:  Scallop Edge Punch, Modern Label Punch, Snowflakes, Gel Pen

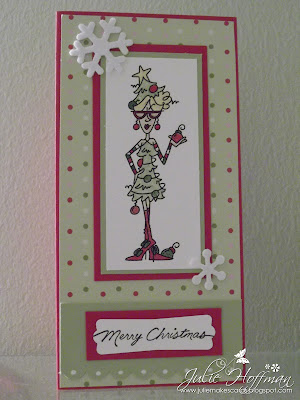
Today I'm sharing a card I made for today's challenge at Catch the Bug Challenge Blog.  Each day this week is a new Christmas challenge and today's challenge is to use the Ruby FREE digital image they provided on your project.

This is the first time I've used a Fixatif on my digital image.  I bought some Krylon Workable Fixatif and followed the directions on the bottle to set the image.  I let it dry for an hour and then colored it using my Stampin Up markers.  I'm really happy with how this turned out.  The only down side is the dry time.  My other option is to buy some Copic Markers (or other non-water based markers) but then what would I do with all my Stampin' Up markers?

This card measures 6.5"  x 3.25"I was inspired to try this size when I read Emily Leiphart's Blog post today (HERE).  I don't know if I've ever done a 6.5" x 3.25" card but I really like it!  I also think this is the perfect size card to use if you're giving a gift of money or a check.  Now I just need to find an envelope that this will fit into.

Thanks for stopping by and checking out my card!  I'd love to know what kind of markers you use and how they work with digi stamps!

I'm also entering this card in the following challenges:

Craft us Crazy - Christmas in July 
Digistamps 4 Joy ~ Christmas
Fairy Knoll ~ Christmas in July     
Simon Says Stamp ~ Anything Goes 
Simply Create ~ Christmas Time   
 Stamp Something ~ Christmas in July
Stampin With The Dragon ~ Christmas in July  


Sunday, July 17, 2011

Buttons and Bows Scarlette

Supplies
Stamps:  Present Scarlette, So Many Scallops
Paper:  Chocolate Chip, Very Vanilla, Certainly Celery, Chocolate Chip & Certainly Celery DP
Ink:  Chocolate Chip, Certainly Celery, Pretty in Pink, Blush Blossom, Crumb Cake
Accessories:  Paper Piercing Tool, Scallop Circle Punch, 1 1/4 inch Circle Punch, Scallop Trim Border Punch, Close to Cocoa Ribbon, SU Twine, Buttons

It's Monday and time for this week's Totally Stampalicious Challenge.  This is a super easy one - we just want you to use Buttons and Bows on your project (at least one of each).  Being the overachiever that I am - LOL, I have 4 buttons (those are clear buttons under Scarlette) and two bows on my card.  I used the Present Scarlette rubber stamp from Totally Stampalicious for the image.

I'm also including this card in the following challenges:

Catch the Bug Challenge Blog - Non - Traditional Christmas Colors
Craft us Crazy - Christmas in July 
Fairy Knoll ~ Christmas in July     
Meljens - Buttons and Bows
Simply Create ~ Christmas Time   
 Stamp Something ~ Christmas in July
Stampin With The Dragon ~ Christmas in July    
Digistamps 4 Joy ~ Christmas     
Want some more Buttons and Bows inspiration?  Head on over to the Totally Stampalicious Blog to see what the rest of the design team has created!
Thanks for stopping by and checking out my card!  I hope you can join us for this week's Buttons and Bows Challenge!

Last but not least I want to thank everyone that stopped by and left comments on my Bugaboo Christmas in July Blog Hop post!  I will be selecting a winner for the turtles winter digi - on Saturday, July 23 from all the comments.  If you haven't commented and want a chance to win the free digi from Bugaboo - you can find the blog hop post HERE.  To find out all the challenges and prizes for the Bugaboo Christmas in July click HERE.


Saturday, July 16, 2011

Bugaboo Stamps Christmas in July Blog Hop

I am so excited to be a part of the Christmas in July Blog Hop with Bugaboo Stamps!  Hopefully you arrived from  Lola Cordova's Blog.  You can find the entire blog hop line up on the Catch the Bug Blog HERE.  Bugaboo has put together a week long celebration you will not want to miss out on!

I made this card using the Bugaboo Turtles Winter stamp.  You can find this digi stamp HERE.   It's impossible to make this turtle look anything but adorable!  The sequins silver snowflake embelishments really pop out IRL.  I added some stickles to the image to give it a little bling!

Supplies:
Stamps:  Turtles Winter, Sentiment from unknown Christmas Stamp Set.
Paper:  Bashful Blue, Real Red, Certainly Celery, Whisper White, Me & My Bright Ideas DP
Ink:  Certainly Celery, Real Red, Wild Wasabi
Accessories:  Modern Label, Word Window,  and Eyelet Border Punches; Colluzzle, Sequins Silver Snowflakes, Swiss Dots Embossing Folder, Stickles, Large Rhinestones, Rhinestone Brads.


Here's a close up of the image:


Now you need to head on over to Lori Padeberg's Blog!  Make sure you leave comments at each stop because EACH DT member will be giving away the image they used for the hop and of course there are many more to  be earned along the way!!  This HOP is full of prizes!!!!

Thanks for stopping by and checking out my card!


Sunday, July 10, 2011

Triangle Star Shaped Card with JJ


Supplies
Stamps:  Cupcake JJ
Paper:  Chocolate Chip Textured Paper, Heidi Grace Sweetest Bug, Whisper White
Accessories:  Three for You Punch, Marvy Giga Scalloped Circle Punch, Marvy Giga Circle Punch, SU Modern Label Punch, Pearls

It's MONDAY and that means it's time for this week's Totally Stampalicious Challenge.  This week we want you to use SHAPES - Anything but a rectangle or square shaped card!  I decided to try something new and I made this Triangle Star shaped card.  I found the step by step instructions for this card on Stamp Owl's Blog HERE.  I made the base with Chocolate Chip 12 x 12 textured paper and then again with 12 x 12 designer paper for the top layer.  I just trimed the DP paper on the score lines and then trimed again on each edge to make it smaller.

I used the Totally Stampalicious Cupcake JJ stamp set for the image and sentiments on this fun card.

Here's a not great picture of the card opened:


I used double sided velcro to hold the card closed.  You can see the velcro on the lower left panel.  The sentiment on the inside reads Party Like a Rock Star!

Check out the Totally Stampalicious Blog for more great SHAPED CARDS!

Thanks for stopping by and checking out my card!  I hope you get a chance to join us for this week's SHAPED Card Challenge!


Sunday, July 3, 2011

Stars, and Stripes and GUS

 Happy 4th of July!


Supplies
Stamps:  Birthday Gus
Paper: Night of Navy, Real Red, Yankee Doodle DP, Red Sparkle DP
Accessories:  Large Star Punch, Small Star Punch, Scallop Edge Punch, Night of Navy Ribbon, White Star Brad


Today, in America, we celebrate Independence Day.  God Bless the USA!


This month is going to be a busy one!  I've been working ahead on my July projects because I'm leaving for vacation on Thursday.  I'm so excited for vacation!  I'm also super excited to share all my projects.

This adorable Gus card is for this week's Totally Stampalicious - Stars & Stripes Challenge.  I used the Totally Stampalicious Birthday Gus stamp set for the image and sentiment.  The designer paper is from We R Memory Keepers (Yankee Doodle designer paper).  I love, love, love this paper!  I also got to use my Stampin' Up Red Glitter paper.  Of course Gus is looking fabulous in Red, White, and Blue - he always makes me laugh.  

The Totally Stampalicious Design Team has put together some fabulous samples for this week's challenge!  You can check out all the samples over at the Totally Stampalicious Blog!

I'm also including this card in this week's Catch the Bug Anything Goes Challenge.   Saturday - July 16th Bugaboo Stamps is having a Christmas in July Blog Hop followed by a week full of Events, Prizes and lots of Surprises!  Click the link on my sidebar for all the details!

I'm entering this card in the following Challenges:
Splitcoast Stampers:  Ways to Use it:  Something Old / Something New
Bugaboo Stamps:  Anything Goes

Craft us Crazy:  Red, White & Blue and/or Summer
I Did it Creations:  Patriotic
Sentimental Sundays:  Anything Goes
Crafting for all Seasons:  Red, White, and Blue


Thanks for stopping by and checking out my card!  I hope you can play along with this week's Stars & Stripes challenge!


Friday, July 1, 2011

July Calendar Page


Supplies
Stamps:  NONE
Paper: SU Night of Navy, Yankee Doodles DP, Real Red, Whisper White.
Ink: Accessories:  SU Eyelet Border Punch, SU Large and Small Star Punches, SU Night of Navy Grosgrain Ribbon
Happy JULY!
Today I’m sharing my July calendar page.  I’m so glad my friend Monique invited me to join this calendar page blog hop!  I’m having so much fun making these pages!

Huge thanks to my Husband Scott for sanding and staining my calendar stand.  It looks so much prettier now!!!! 
This page measures 6.5 inches square.  The designer paper is from the Yankee Doodles 6 x 6 paper (We R Memory Keepers).  I created the calendar in Microsoft Excel and printed it out on Whisper White Cardstock.  Then I just added the red scalloped mat, stars and ribbon.  I love how quick and easy this page was!
Thanks for stopping by and checking out my calendar page.  Be sure to stop by and see all the other great calendar pages that my friends have put together!  Here are the links to their blogs!
I’m also including this calendar page in the following challenges:
Bugaboo Stamps – Recipe Challenge – Red, White & Blue with Ribbon
Squigglefly – Red, White, and Blue
Crafting for All Seasons Challenge Blog - Red, White, and Blue
Craft us Crazy - Red, White, and Blue
PaperCrafting Journey - Anything Goes
Kenny K - Hooray For The Red White And Blue